Converting among PNG, JPG and WebP changes the container and the encoding. It does not make the picture “better”. When a PNG becomes a JPG, any alpha channel is flattened onto a background colour. When that JPG is saved back as a PNG, detail already discarded by JPEG does not return, and the file is often larger. WebP to PNG is usually about compatibility with software or platforms that still do not accept WebP. All of these conversions run in the same local XunL workbench; the three entry points only change the default output format: PNG to JPG, JPG to PNG and WebP to PNG.
The behaviour below was checked on 17 November 2026 against those three pages and the shared conversion script. Files are not uploaded to a server. Limits are at most 200 files, 50 MB each, and 60 million pixels. This article does not cover squeezing an image to a fixed file size, upscaling pixels, or removing a background — those are different tools, and existing posts are linked at the end. Output size depends on the source file. The only kilobyte figures in this article are the rounded values the workbench showed for the 17 November 2026 fixture test below; after you download a file, check the actual format and size.
PNG to JPG: transparency becomes a background colour
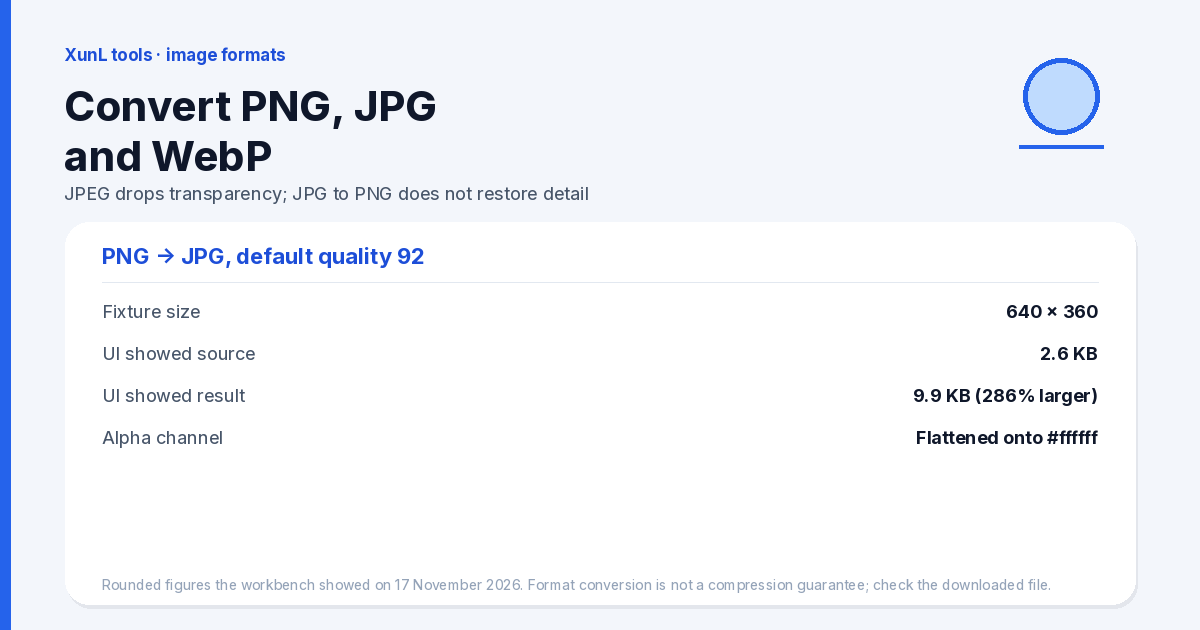
Open PNG to JPG. The default output is JPEG, default quality is 92 (the slider runs from 10 to 100), and the default background used when flattening transparency is white #ffffff. JPEG has no alpha channel, so a transparent PNG — an icon, a cut-out product shot, a sticker with a shadow — will fill the formerly transparent pixels with that colour. If the product will sit on a dark or scenic background, set the colour you actually need before you export; do not leave a default white halo to fix later.
Do not enlarge small images is checked by default, and the resize mode defaults to Keep original size. The quality slider only changes how aggressively a lossy format such as JPEG or WebP compresses; it will not sharpen edges that are already rasterised. If the real goal is “this file must be under a given number of KB”, use a dedicated size-cap workflow, or type a cap in Target size KB (optional, takes priority), rather than relying on this page’s default quality of 92.
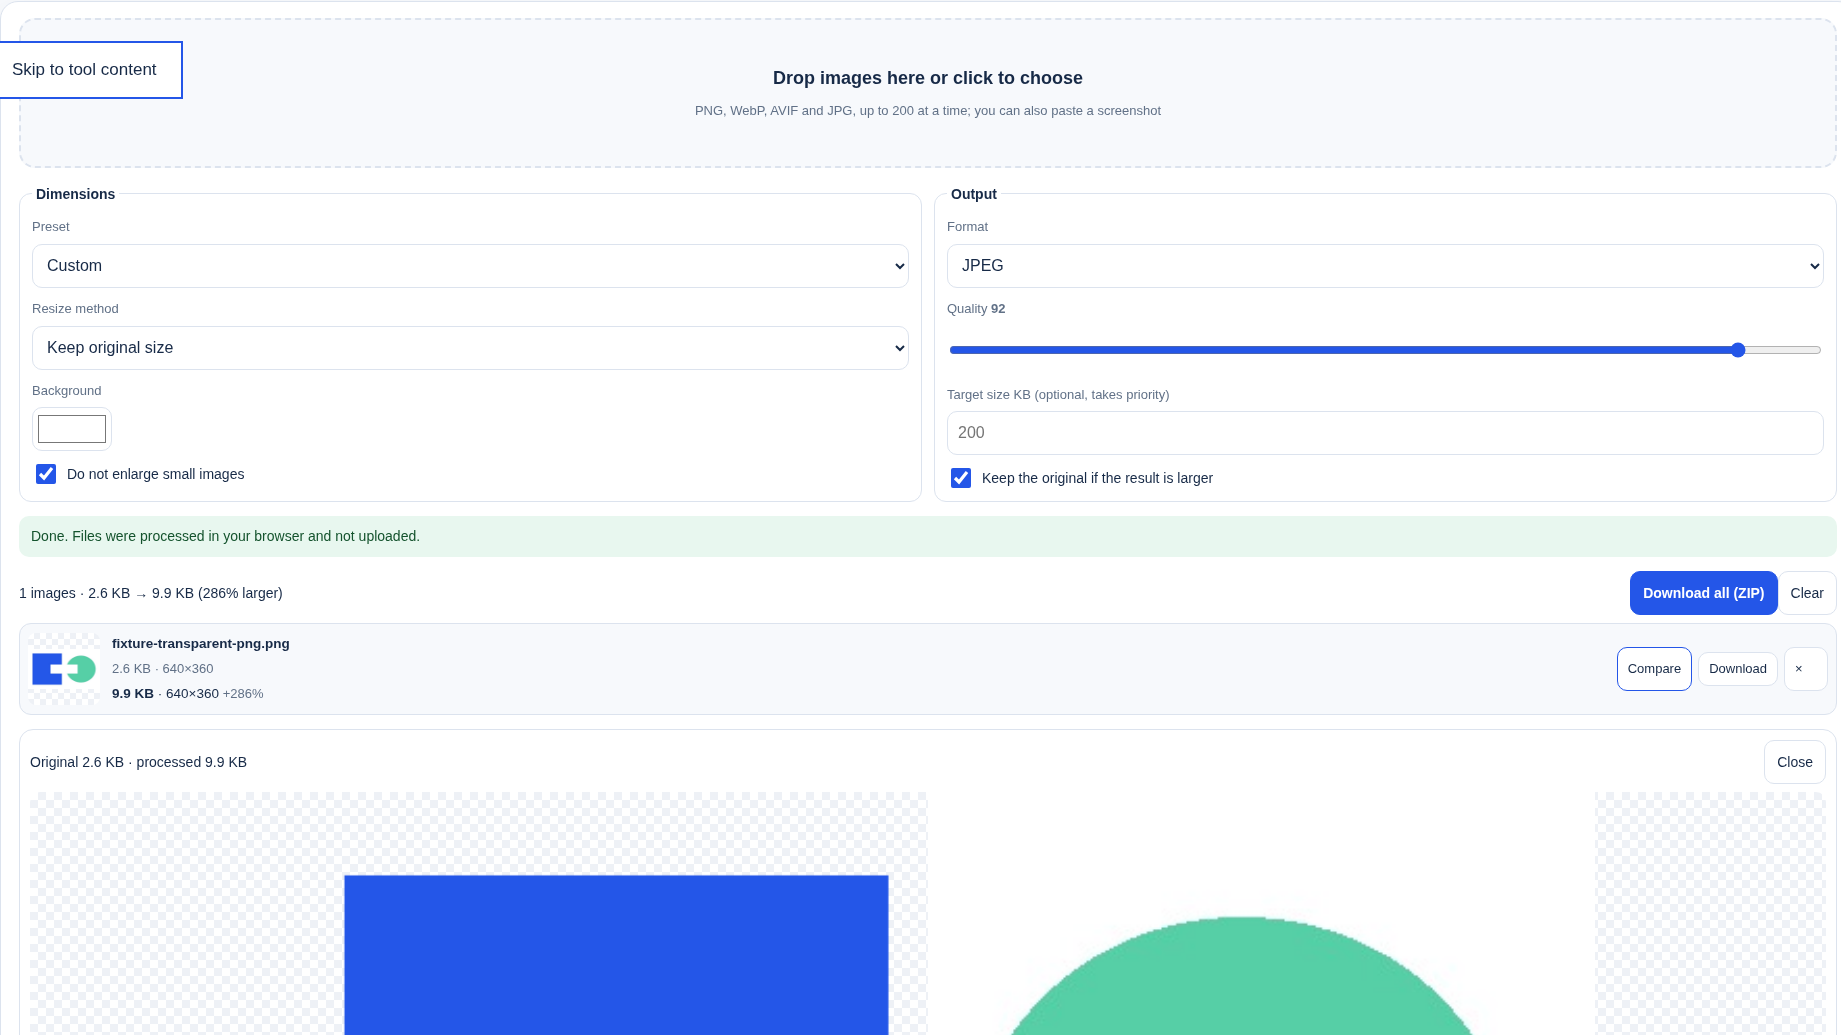
On 17 November 2026, the 640×360 transparent PNG fixture was converted on PNG to JPG at the default quality of 92, with background #ffffff, and Keep the original if the result is larger was checked. The workbench displayed 2.6 KB → 9.9 KB (286% larger). Format conversion is not a compression guarantee: changing the container or encoding can make the file larger. After you download, inspect the actual format and file size. If you did not need the conversion, keep or re-select the original yourself.
JPG to PNG: the pixels remain, but discarded JPEG detail does not come back
Open JPG to PNG. The default output is PNG. This step stores the JPEG’s pixels in a lossless PNG container. It does not rebuild texture or edges already lost to JPEG compression. A photographic JPG saved as PNG is often larger than the original, because PNG no longer uses JPEG’s lossy compression. If the only reason for the conversion is “so it looks sharper”, the result is usually disappointing. What you need is a larger original or a dedicated upscaler, not a change of suffix.
PNG is a fit when you still need transparency, an icon workflow, or repeated edits. It is not a way to turn a soft photograph back into a RAW file.
WebP to PNG: usually for compatibility, not for more detail
Open WebP to PNG. The default output is PNG. A common case is a browser or design tool that exported WebP, while the destination platform, print workflow or older tool only accepts PNG or JPG. A PNG can keep an alpha channel that was already present in the WebP (unlike a JPEG export). As with JPG to PNG, this step does not invent detail that was never in the source.
If your workflow needs JPEG rather than PNG, the same workbench can switch the output format to JPEG — and transparency will again be flattened onto the background colour. The site also has a separate WebP to JPG entry point; the rule is the same as “output JPEG”: do not assume size or quality will improve, only that the format becomes one the recipient can open.
Saving a PNG as WebP: use the format menu; there is no /png-to-webp/ page
There is no dedicated https://www.xunl.net/tools/png-to-webp/ URL (it returned 404 on 17 November 2026). Open any of the conversion pages above and set the output format to WebP on the same workbench. The conversion is still local, and the same limits apply. WebP can keep transparency and is often smaller than a similar-looking JPEG, but the recipient has to be able to open WebP. If they cannot, convert back to PNG or JPG as in the previous section.
One caveat: JPG to PNG and WebP to PNG default to PNG output. The quality slider’s HTML initial value on those pages is 80, but the default PNG export does not use that quality value. The slider only applies after you switch the format to JPEG or WebP. If you switch to WebP from PNG to JPG, the slider is still at that page’s default of 92.
Batch limits, and what this workbench will not do
The workbench states 200 images per batch, 50 MB each, as many batches as you like. That is a capability, not a separate “batch conversion product”. Keep the original if the result is larger is checked by default, but do not treat the label as a guarantee that a larger result will be discarded. In the 17 November test that option was checked, and the 640×360 transparent PNG still became a quality-92 JPEG that the UI showed as 2.6 KB → 9.9 KB (286% larger). Format conversion is not a compression guarantee. You can also fill in Target size KB (optional, takes priority); the 200 in the screenshot is the field’s placeholder, and no target size was entered in that test. A file over 50 MB is rejected with “The file is over 50 MB.” A frame over 60 million pixels is rejected with “The image is too large (over 60 megapixels).” Many phone HEIC photos cannot be read here; the tool says: “This browser cannot read HEIC; export it as JPEG on your phone first.” After you download, check the actual format and size; if you did not need the conversion, keep or re-select the original yourself.
Do not use a format conversion as a stand-in for work already covered elsewhere:
- When the file must be around 200 KB, see Compress Product Images to 200KB: TinyPNG Alternative
- When the source is simply too small, see Upscale Small Product Images 2x or 4x: A Worked Example
- When you need the background removed rather than filled with a flat colour, see remove.bg Alternative: Full-Size Product Cutouts
- For a broader retouching path, see Free Photoshop Alternative: Crop and Label Product Images
Format conversion will not raise resolution, restore detail already lost to lossy compression, or apply for or embed a copyright statement.
Put this guide to work for your business
Start free tools with Google or an email code. Create a company and compare Pro plans when you need monitoring and team permissions.
Personal accounts use Free limits. A separate new company receives a 7-day Pro trial, excluding paid monthly credits.